Electric Cookie Tin Banjo, Cat Dulcitar Build

I made this one for a special friend I grew up with. The tin box is actually a vintage stationary tin. The neck for the cookie tin banjo
is a piece of wood from a vintage weaving loom called a picker stick. Frets were cut as well as thinning out the end that goes in the box. These aren't detailed instructions but you can get some ideas from the pictures below.


You will need to measure your wood for the neck, cut and add your frets, which is another skill I will blog about at another time.


yep, that's a popsicle stick glued on at each end to give airspace. You'll have to determine how thick you need it. The screw goes through it at final completion. Keep in mind...the the box can't be higher than the neck unless you balance it out with a higher bridge. The grooves aren't necessary. I get carried away sometimes.

Put your neck in the box and check it out how it looks and feels, before gluing the support blocks inside.


The transducer is is removed from the black plastic shell it comes in.
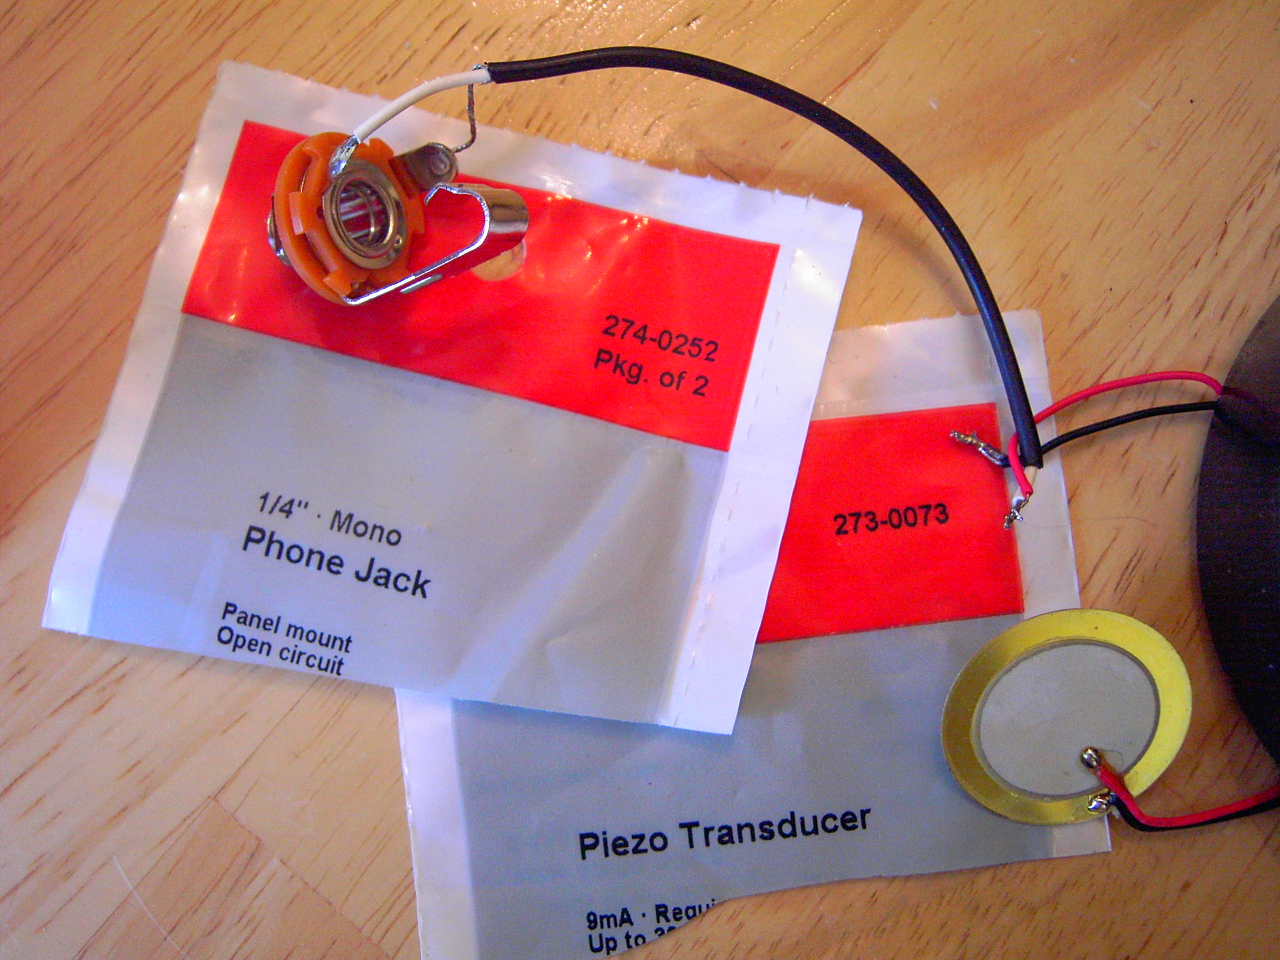
I learned my lesson the hard way. Check out your pickup with a little amp after soldering, and again before sealing the box with clear silicone. Not shown, add black tape to your splices. Make sure wires don't hang down touching the box. This will cause rattling and unwanted vibrations when you play.

Since the jack was installed in "tin" and not wood with a bolt and washer... A tiny drop of super glue was put on the nut, washer and shaft to avoid coming undone with all the music vibrating the tin. I reinforced it with rubber electrical tape and super glue to absorb shock. If it is ever dropped it should stay put.
I would also like to add... I want my instruments to last forever, or strive for that in the building process. We all know what happens to black tape if it is left in a hot car. It becomes goo-ey and will loose its hold. The super glue added to tape will hopefully keep it in place. Note, the tape is not holding the parts in, only covering up parts to absorb shock.


I precisely cut blocks of wood for a tight fit under the neck. Wood glue is used and in my case, my drill gave me the weight I needed to hold it down to dry for 24 hours. This process is something I started doing later to make a solid instrument hold up under every day normal use. If you play a guitar or banjo, you already know how much pressure the sound box takes resting in your lap as you play. Unlike wooden cigar box guitars, without these supports and only the neck pressure resting in the tin cut-outs ... eventually the tin would warp over a period of time. My theory anyway.

I've experimented with several types of super glue on my pickups. The gel seems to give it a better sound since it can vibrate along with the pickup.


I glue the pickup on top the center part of the wooden neck that is in the box.

(this is a view of a different instrument)

Using an example from a different hinge... the long bolt through the end of the neck is what gives it all the strength to support the 3 tight strings.

Cabinet Hinges from Lowes

drilled pilot holes for the small screw (s)

Drill the center hole for the long screw and pilot holes for the smaller screws. I placed the other in of the neck on the floor and drill down to get enough pressure to drill hole for the long screw.

Finish up with 2 screws on back at each end. These are drilled into the permanent support blocks inside the box. Pan head screws are preferred.
Add your classical tuners, strings and a stained pencil size dowel for the bridge.
For a few more details on this type build of canjo, cookie tin banjo or dulcitar, go check out the "asian dulicitar" in this blog.

